For the past couple of years, more and more piano teachers have been turning to Zoom to provide online music lessons for their students. There are so many benefits to zoom piano lessons, from being able to teach students further afield, to the student feeling more comfortable playing and learning in their own home on their own instrument.
But the question that gets asked a LOT is ‘how do I set up for a zoom piano lesson?’
Let us give you some answers!
TABLE OF CONTENTS
If you’ve been reading teaching forums or Facebook Group comments about online piano lessons, you may be thinking that your online setup is underprepared and lacking. The truth is though, you can teach an online piano lesson just fine with your mobile device and FaceTime.
An advantage to this simple setup is you can take this anywhere! Some teachers favour online piano lessons as they can still teach while travelling – all they need is a keyboard and mobile device and they’re good to go!
Of course, fancier tech will result in better quality visuals and audio for your students, providing them with a more enjoyable learning experience.
An absolute starter pack for teaching piano online would be:
It also goes (hopefully) without saying that a high internet speed is always beneficial for online lessons. The easiest thing to maintain a high speed is to plug your laptop into the modem using an ethernet cable. This way you won’t dip in and out of the Wi-Fi as you’re physically connected.
When you got your music degree and began teaching piano, you probably didn’t think one day you’d feel like you also needed to have a degree in IT to help you with online piano lessons!
But trust us, it’s not as hard and overwhelming as it seems!
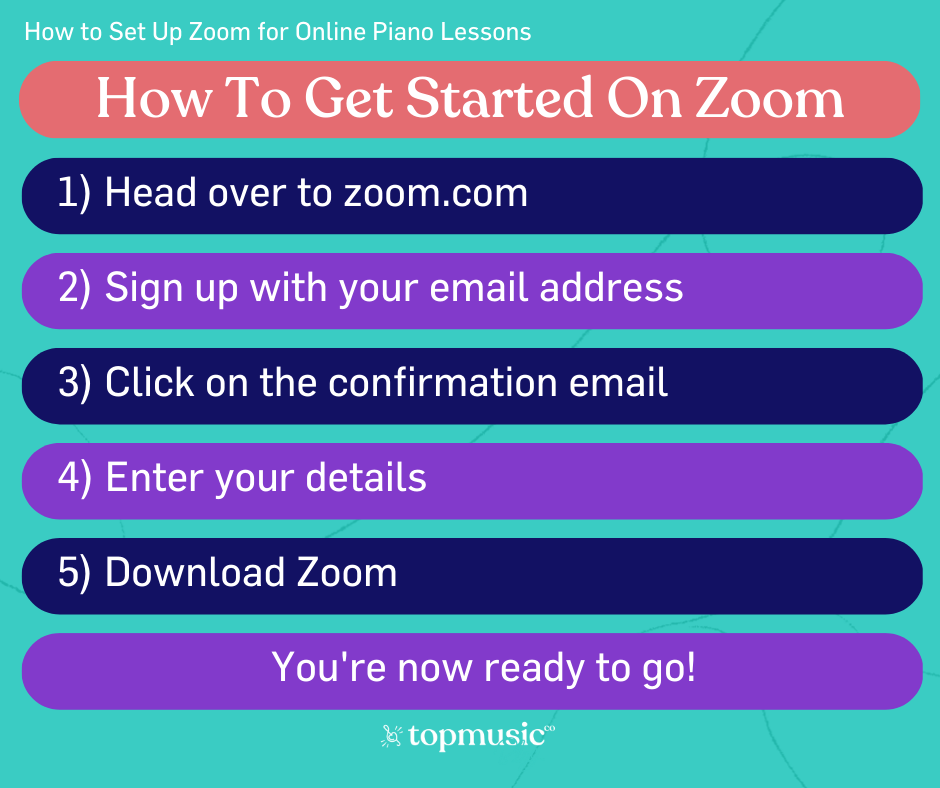
Assuming that you have never used Zoom before, we’ll talk you through how to set up:
1. Head over to zoom.com.
2. Sign up with your email address.
3. You’ll then receive a confirmation email which will lead you to enter your details.
4. You’ll need to download a bit of software to your computer or device in order to use Zoom. (Your student can use Zoom just in a web browser, without downloading anything, but they will have limits to what they can do)
You’re now ready to go!
Once you’re inside, you’ll see your personal meeting URL. This means you have your own meeting room that people can attend only if they have the link. Copy the URL to send to your students so they know where to go for the lesson.
(This URL link is always available for you to access, so don’t worry about keeping a note of it.)
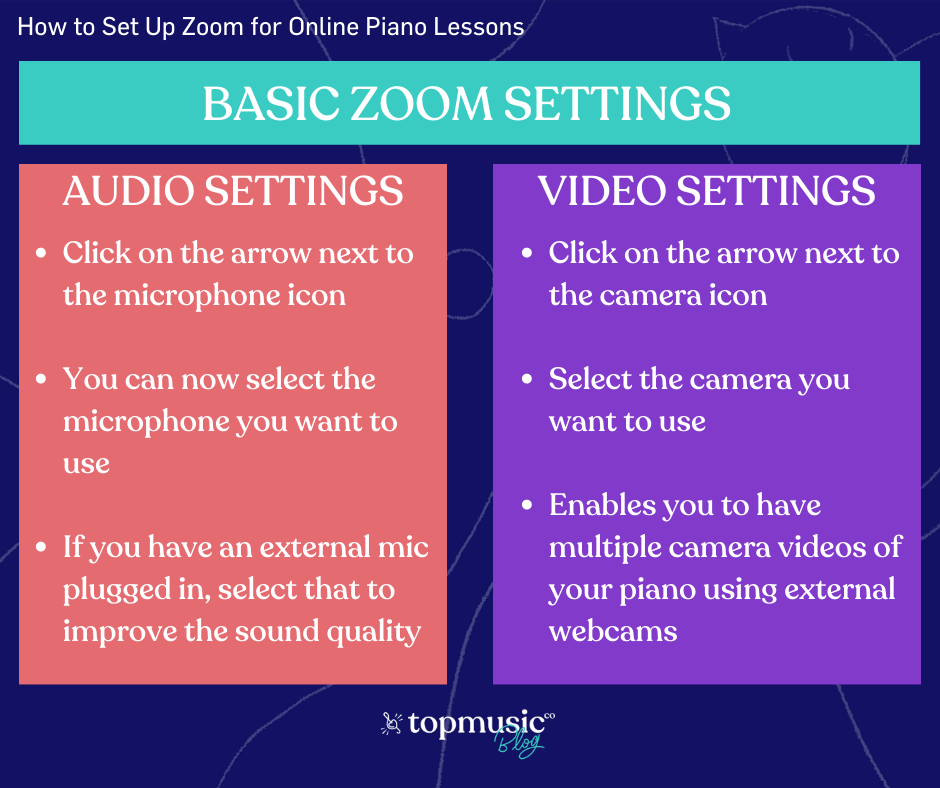
There are then many different settings you can change:
1. Audio settings. By clicking on the arrow next to the microphone icon you can select the microphone you want to use. If you have an external mic plugged in, select that from the list. This will then help you improve the sound quality of your online piano lessons!
2. Video settings. By clicking on the arrow next to the camera icon you can select the camera you want to use. This is incredibly useful as it enables you to have multiple camera views of your piano, allowing you to demonstrate certain techniques using an overhead camera so your student can see the whole piano as they watch you play.
These are the basics – as you become more familiar with Zoom you can explore the app more and find what works for you.
All you need to get started is the URL link, the audio settings, and the video settings!
You have the option of using the same Personal Meeting URL link for every student, or creating ‘meetings’ (online piano lessons).
If you use the same link for everyone, be aware that if two people are using the link at the same time, they will be in the same meeting (just like if two students had turned up at your house at the same time). This may be disruptive – if a student is early, they run the risk of disturbing the end of the previous students’ lesson.
(Pets are always a happy disruption to online lessons!)
Two ways you can work around this:
You know all the basics to get you started with Zoom piano lessons, but there are possibly other buttons that are catching your eye!
You can tick ‘Learn how to set up for a zoom lesson’ off your to do list, but there are some more questions you may have when it comes to live online piano lessons (and hopefully, we can answer them!)
Until students start complaining they can’t see you properly, it’s easy to forget about lighting. Take into consideration…
Weirdly enough, the format of online lessons is much more face-to-face than an in-person lesson. Your students will be looking at your face SO much more in an online piano lesson than if they were at your studio. What does that mean? Smile more! Even more than you think you need to!
It’s easy to think that because you’re in your own studio and no one is coming in to disturb your materials and resources that you’ll be on the ball and organized for every lesson. But unless you plan in advance, you’ll find yourself going off-camera to find a book, or shuffling through papers to find the correct student notes.
A way to ensure you’re ready for back-to-back lessons is to start 30 minutes early and make sure you have every book, digital score, notes of assignments, pencil and paper to hand. You can then even make a roadmap, writing out your students and your plan of action for each lesson.
It’s also useful to keep digital resources handy in times of unplanned moments. If a student has left their music at their grandparents’ house and has nothing to play, you can share your screen and have them work on something new for that lesson (or email over the music for them to download and print then and there).
Being an online piano teacher does not need to feel radically different from being an in-person piano teacher.
Of course there’s the obvious difference in that you’re not physically there to point at their music or demonstrate things in front of them. All that means is there’s more of a focus on the student listening as you describe and explain. Sure, in remote lessons you can’t show them which ‘C’ to put their thumb on. But you can provide instructions like, “Find middle C. Find the C an octave above that. Put your right hand thumb on it.”
Hopefully you’ve found this look into online piano lessons helpful, and you’re feeling more confident when it comes to teaching on zoom! If you’re looking for more info, check out:
The Art Of Tiding Up Your Space for Online Lessons
Piano Teaching and Studio Business Tools
Not How I Was Taught: Your Ultimate Guide To Online Piano Teaching