
Put the joy back in your music teaching space by tidying up for online lessons!
My holy grail of teaching is to have a clean, neat shop. At a teaching conference with Lee Galloway, Lee shared it’s a great thing to keep the top of your piano very neat – 1 tray only. I’ve never forgotten that and always make it a goal to return to at the end of the day.
Chefs call this practice mise en place — keeping your knives and counter clean and ready to go so you don’t waste time and trip yourself up with a mess at your workstation.
So it’s been on my mind for months how to incorporate the concept of mise en place with online teaching and keep it neat and comfortable. For my students. But also for me — I want to be happy in the studio!
Let’s look at 12 adjustments for a neat mise en place in this article about tidying up for online lessons.
Floor tripods quickly crowd and cramp your space.
I had a conversation with a colleague the other day about why online teaching strains your body. The gear surrounding you is part of this problem of non-movement.
The law of online teaching is that if your foot is nearby to the overhead cam stand, you will surely kick it at some point, and then the camera angle is shot.
Replace any floor tripod with something else when possible.
These items all hold your AV gear without the big footprint stands:
Any of these stands can take the place of a floor tripod if you have an existing piano, desk or shelf handy nearby. Read on for where to store these peripherals out of sight.
This is a pro tip I learned from Joel McCray, a gigging performance friend who’s on the road a lot.
Joel said:
Never mix home studio gear with your road gear. Murphy’s law is that you will be packing for the road late at night, or someone will helpfully try to help you pack out, and something gets left behind. Then you’re finding yourself at Best Buy shopping for $60 gaffer tape that just got lost.
One tidying principal gleaned here is to minimize the gear shuffle by keeping a dedicated set of gear just for your online teaching space.
Mostly this is in reference to peripheral equipment. Amazon is full of off-brand versions of the afore-mentioned items like boom scissor arms or laptop stands. It can be an area you spend your money twice, however. These knock offs are made of thin metal generally, not machined well, with rough fittings that wear out or snap. If you’ve invested in good mics, don’t put it on a cheap mic arm where it will never hold in place. This is like death by a thousand cuts: the mic that sags downward during your programming.
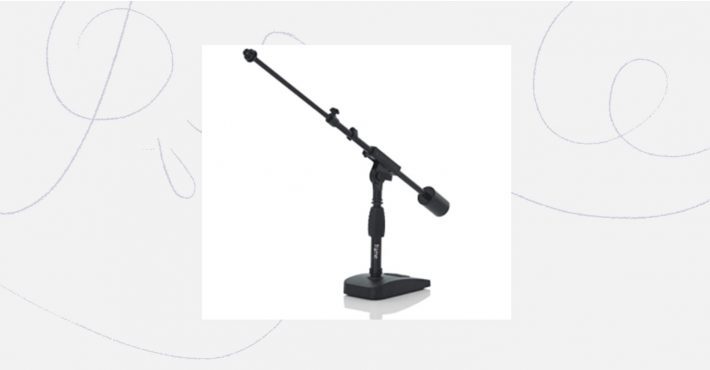
Gator weighted mini boom stand
Better pick: A good quality boom arm like this Gator weighted mini boom will stay in place and have the stability to not fall off your table or drop the mic under the heavier weight.
Here are two studio organizers for cords management:
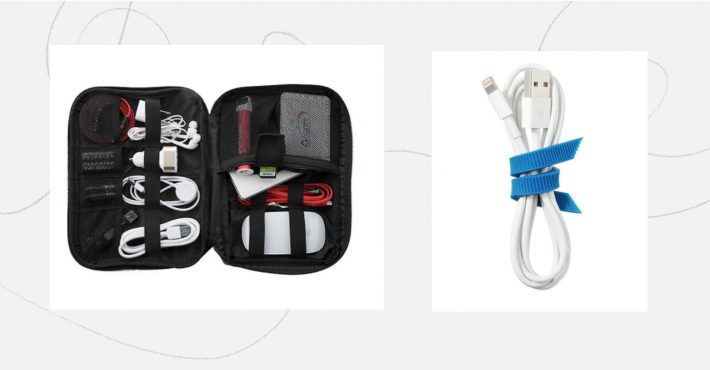
Travel case and flexible cable ties
Dust is the enemy of delicate sound gear and lenses. By running a hepa filter in your teaching space, you’ll remove dust particles and microns from the air and keep them out of your gear. It’s also generally healthier to clean the air this way and will be a big bonus regarding seasonal allergies.
Whether you’re filming asynchronous lessons, teaching live online, or filming coursework, know precisely how much time it takes to locate and set up all essential gear, and books/peripheral teaching items.
5 minutes on each end is my personal target if I’m filming repetitive daily items like a video lesson.
Alternatively, Tim likes to time block out studio filming days for bigger setups like courses. (Check out Tim’s Instagram story to see his gear setup.)
This will help streamline your schedule, keep you from being late to meetings, and lighten your attitude about getting down to work! When I notice I’m starting to take too long to set up for teaching online, it’s a mental cue to reevaluate my regimen and simplify things.
Folding room divider screens are a good solution for tucking away gear & backup equipment out of sight.
Behind the screen, you can stash tall gear such as lights or mic stands. Store them vertically in a tall/thin laundry hamper for quick access. Put a weight in the bottom of the basket if it’s top-heavy.
My preferred type is a padded fabric-covered panel because it helps soften the sound in a room, resulting in an acoustics improvement.
One Kings Lane has beautiful options in fabric, or try home decor sites like Wayfair of Ikea for low-cost looks.
What? You have absolutely no room/budget for that, AND a mess of gear?….
Another way to tidy up a utilitarian tech area is to hang a curtain from the ceiling on a long rod. This will keep your gear safe and out of sight without taking up square footage on the floor.
This is also perfect if you both teach online and serve in-person students.
TopMusicPro member Selena Pistoresi shared that special needs students particularly benefit from a neat, calm learning space. Tidying up your online gear (and teaching space in general) will be especially helpful to these students.
A common issue with standard length curtain rods is — they’re too short to function as room dividers.
I’ve used one for ten years like this and it still looks perfect, holding four neutral print curtain panels across a bookcase wall for a neat look. The days of staring at the printer, assorted gear, or having students occasionally browse through my teacher supplies is over!
Did you get an extra monitor this year for teaching? Hang things out of sight on the backside with a strong Command hook. I have a pair of noise-cancelling headphones and a ring light on the back of mine.
By using a high-wattage charger, you can quickly power up your devices for the day, reducing last-minute panics of finding chargers midway through teaching for almost-dead devices.
This Anker 60-watt charger is my go-to charger.
It’s so effective that it gets stolen from my gear box regularly by my family members. A USB-C cable will charge fastest, or use USB if you need to. Yes, it powers up the 12.9” iPad Pro really fast! Also a MacBook Pro.
Whether you keep gear just in one location in dedicated bags or occasionally take it on the road, you’re going to thank yourself later for finding good ones. Here’s some excellent choices:
These Timbuk2 messenger bags were designed by bike couriers in San Francisco to withstand all the elements. They look sharp and don’t wear out.
Freitag of Germany also makes unique gear bags out of recycled truck tarps.
If a mic or camera is too top-heavy (so common!), it’s customary to use a sandbag to secure the base. No sandbag? Repurpose a light hand weight wrapped in a neoprene lunch carrier to act as a counterweight. Thanks to photographer-turned-concert-pianist Nahre Sol for this DIY tip!
So, online teaching is here to stay, and with it – all the peripheral equipment. To get the most out of your space, and keep your tech handy and safe, try a few of these tidying up tips for a more happy and organized studio environment.
If you’ve got a tip of your own to share, let us know in the comments or tag us on social media!


Edna Bloom says:
Spring clamps (found in woodworking or automotive departments) are inexpensive and quite versatile for securing cords and all sorts of things. Recently I used two to improvise a ukelele holder.
Torey Zachary says:
Great article! Very timely 🙂
Rebecca Stewart says:
Why hadn’t I thought of sandbags? This article left my brain buzzing with ideas for my particular situation. Thank you!
Emily Laney says:
oh good! I’m so glad it sparked some new ideas for your space, Rebecca! Cheers.