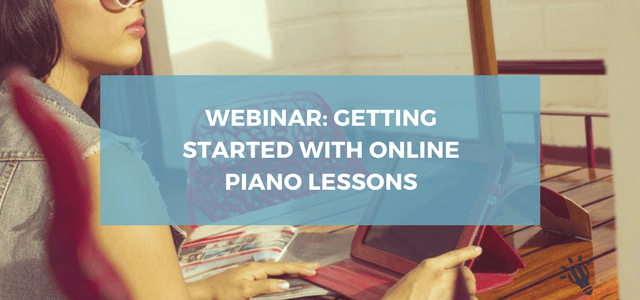
Online teaching can be overwhelming. We break down the equipment to get you started.
With the world heading more into the online world every day, it’s become more common for music lessons to be filmed for students to watch. You may find yourself needing to record lesson content and feeling a bit overwhelmed.
We’re going to through all of the steps you need to record online lessons. This guide is here to help you and show you that all teachers can do it, no matter how experienced you are with cameras and recording equipment.
You’re going to need to start with a gear checklist if you plan on recording lessons.
Filming content is easy for everyone with a phone. However, having high-quality gear will elevate the overall quality of your videos. It will also make you look more professional as a teacher. So, here are a few things that you’re going to need.
The most important aspect of any online music lesson is the sound. This isn’t just the case with music, though. Any accomplished video maker will tell you that sound quality is the most important aspect of a video before anything else.
So, you’re going to need to get a microphone. You’ll most probably need a few microphones if you’re teaching a larger instrument. For example, a saxophone will only need one mic while a drum kit will need several.
If you don’t use microphones, the sound will be picked up from whatever camera you’re using. Camera mics never sound great. Or you can choose an instrument like electronic drum sets that don’t need any mics to be recorded.
It’s also a good idea to get a mic for your voice. The instrument mic will be pointed at whatever instrument you’re teaching your audience to play, so a dedicated vocal mic will allow you to easily speak into it.
Some mics can be plugged directly into a computer while others need a recording interface. We’ll touch a bit more on that later, though.
Related: TC241- YouTube Masterclass
Once you have your audio sorted, you should focus on how the video looks and how it’s shot. The easiest and most affordable way to record a video is to use a cellphone. The majority of people have phones, so you won’t have to spend any money on buying a
video device.
However, phone cameras are extremely limited. If you want more control over how your video looks, you should invest in a DSLR or Mirrorless camera. These cameras take a while to learn how to use, but they have so many more capabilities. They allow you to get top-quality professional footage for your music lessons.
A good example of an affordable Mirrorless camera that many people use to record music
lessons is the Canon M50.
If you want your music lessons to be dynamic, you could use multiple cameras to get different angles. Just note that you’ll need to use video editing software to mix all the camera angles together.
Having multiple angles is great for larger instruments such as drum sets. It will allow the student to get a very clear picture and the idea of what you’re playing and teaching.
Lights aren’t the most essential thing when recording, but they’ll make a massive difference in what your video looks like. All cameras love lighting, so you should film your videos in a space where there is an abundance of light coming through. If you don’t have any dedicated lights for the video, the best place to film would be in front of a window.
If you want your lesson videos to look professional, you should get a few LED lights. Having focused light will bring out a better image from your camera. It will also give a more focused atmosphere to your video lesson.
Thankfully, you can get some affordable LED lights. Even though they’re cheaper, they do a good job of focusing on what you’re filming. Lights from the brand Neewer provide a great place to start.
While those lights are fairly affordable, bigger LED lights can end up costing thousands of dollars. In the case of teaching music online, it would be better to invest more money into microphones and cameras before you spend a huge amount on lighting.
Plan Your lesson and the Video Content
Just like you do with in-person music lessons, you should plan your video lessons well in advance. You’ll find that you’ll need to do even more preparation for video lessons as you won’t be getting any real-time feedback from your students during the lesson.
So, the lesson needs to run smoothly from beginning to end. Your planning should be meticulous so that you don’t make mistakes during the filming process. Too many mistakes will cause you to reshoot, and that can end up taking out a good chunk of your
time.
You’ll find that the more you make videos and the more you plan for them, the fewer mistakes you’re likely to make while shooting.
Another thing that you need to plan for is the specific time limit that you’re going for.
While in-person music lessons can be up to an hour-long, no one is likely to make it through a whole hour video lesson.
A general time to stick to when making video music lessons is around 20 minutes. That gives you enough time to explain your points clearly. It’s also not long enough for most students to lose interest.
One of the best ways to ensure consistency between all your music lesson videos is to set up a dedicated space for them. If you have a dedicated recording space, you’ll be able to commit to recording more videos more often.
You’ll also have the same aesthetic through all your videos which is great for making the
student feel connected.
Many people have makeshift recording spaces that they set up to record. This often leads to them only recording every now and then. If you set up your mics, cameras, and lights in one spot, you’ll be able to turn everything on and film whenever you need to.
It’s a great way to stay productive with your lesson filming.
A digital audio workstation is what you’re going to need if you plan on recording your music lessons with microphones. If the microphones can connect to a computer via USB, the DAW is all you’re going to need. If they use XLR cables, then you’ll need an audio interface as well.
Starting with the interface, you can find some highly affordable ones that are very easy to use. If you’re just recording your instrument and your voice, you only need an interface with 2 channels. Something like the Focusrite Scarlett 2i2 would be the perfect device to have.
The next thing to worry about is what DAW you’re going to use. There are a few free ones as well as many professional paid ones.
Free Options
The most popular free DAW is GarageBand. You can get it on any Apple device, and it’s incredibly easy to use. It’s arguably the easiest DAW to use out of all of them as the layout is so simple to understand.
If you have an Apple device, we’d suggest using GarageBand over any other free DAW. This is especially true if you’re not planning on going into hectic detail with sound engineering.
If you don’t have a Windows computer, you can use a DAW like Audacity. It’s also free and fairly simple to use. If you’re just planning on recording video lessons, Audacity has everything you need to get the job done.
Premium Software
If you want the highest-quality sound you can possibly get, you’ll need to pay for a good DAW. Paid recording software will always have more customization options, giving you much more control over mixing and EQing options.
Paid software is what professional recording studios use, so the possibilities are endless when you have a DAW that you paid for.
Two of the most popular paid DAWs are Logic Pro X and Pro Tools. Logic Pro X is a heavily upgraded version of GarageBand, so it’s a good one to get if you’ve used GarageBand before. Similarly, it’s only made for Apple computers.
Pro Tools is a fantastic DAW to use on a Windows computer. However, it’s also compatible with Apple computers.
We’d only suggest getting premium software if you have the time to learn to use it properly. If you simply want to record your music lessons to get decent audio, free software will work just fine!
Related: A Beginners Guide to Piano Composition in the DAW
Like any skill, recording music lessons in front of a camera is something that you need to practice to get better at. You might feel a bit awkward at first, but talking to the camera will start to feel very natural after some time.
Just remember to keep all your points short and summarized so that you don’t end up with an hour-long lesson video!
It’s better to tackle smaller lesson topics and span them across multiple videos rather than cramming many topics into one. It’s also easier for your music students to follow and select those shorter videos.